
Interested in faster HDRI cubemap loading and smoother UX for your web graphics applications? I’ll discuss a way to utilize Low-Quality Image Placeholders (LQIP) techniques along with Web Workers to get the website visitor to a running application as quickly and stutter-free as possible.
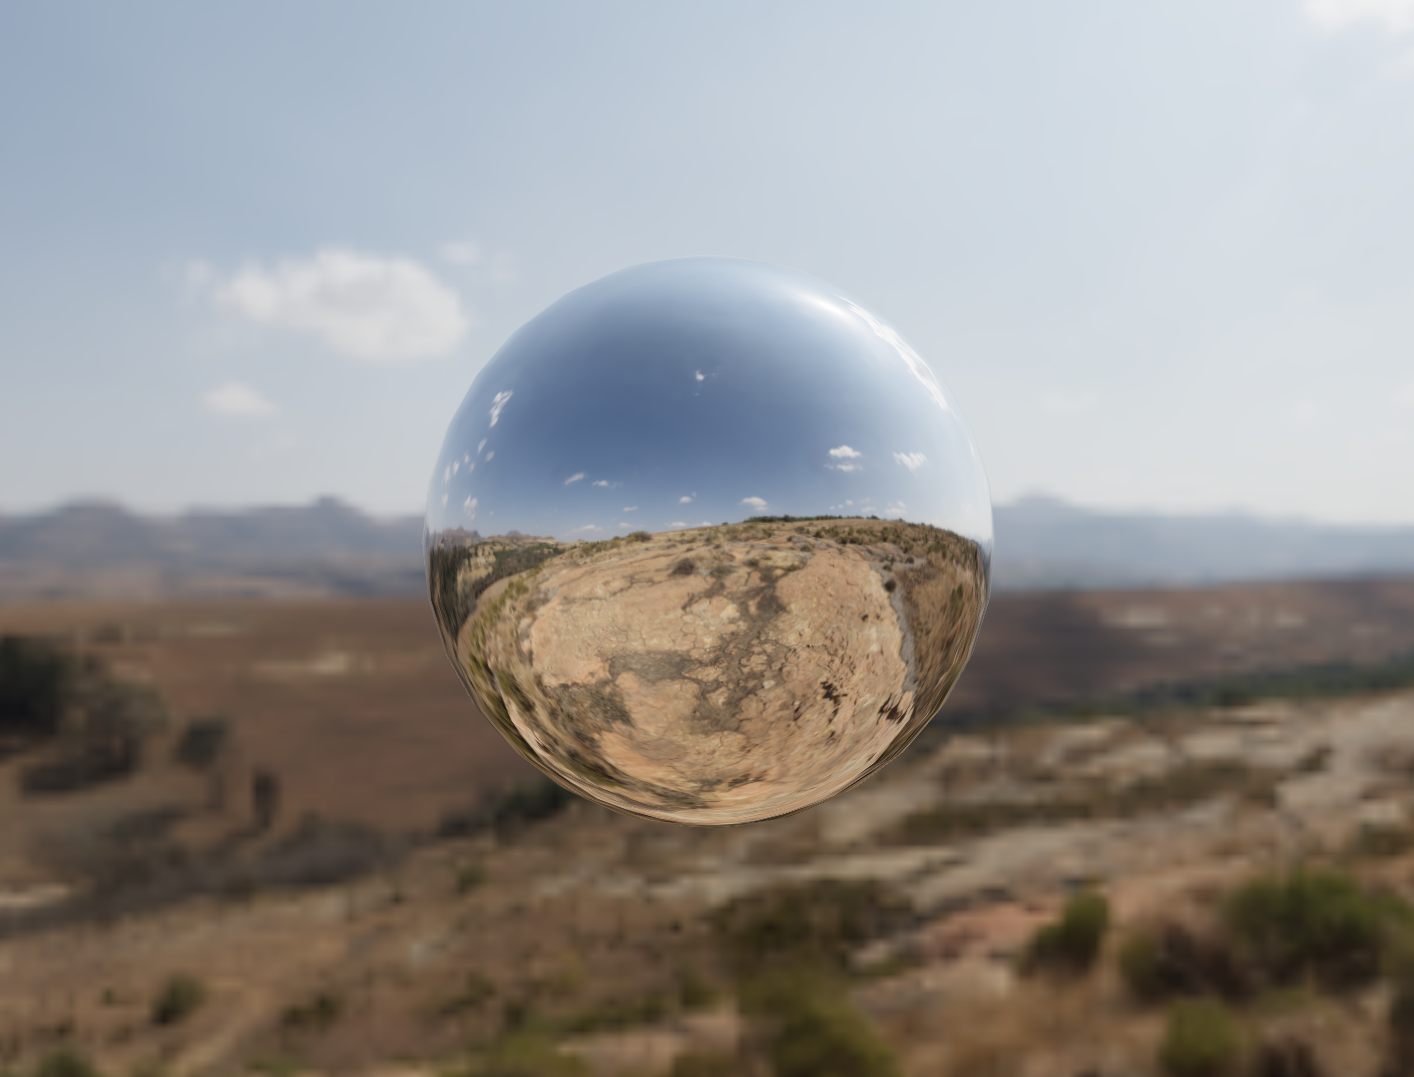
I enjoy adding HDRI panoramic images to my scenes as cubemaps for textures, skyboxes for background environments, or both! They bring out the textures and details of the objects and materials in the scene and give a sense of purpose and realism. However, they present a big problem in web graphics since their files sizes can be quite large. We’re talking ~5MB for 2K HDRIs or ~20MB for 4K, which can result in insanely slow load times. This means your users, such as a new client arriving at your fancy website for the first time, can have to wait for a few seconds or more before seeing your glorious content. If we settle for 1K resolution HDRIs then cubemaps barely acceptable, but skyboxes are completely worthless with their large pixelation. Below we see the 1K resolution scene on the left and the 4K resolution on the right, using the Fouriesburg Mountain Midday HDRI image by Dimitrios Savva and Jarod Guest on PolyHaven.

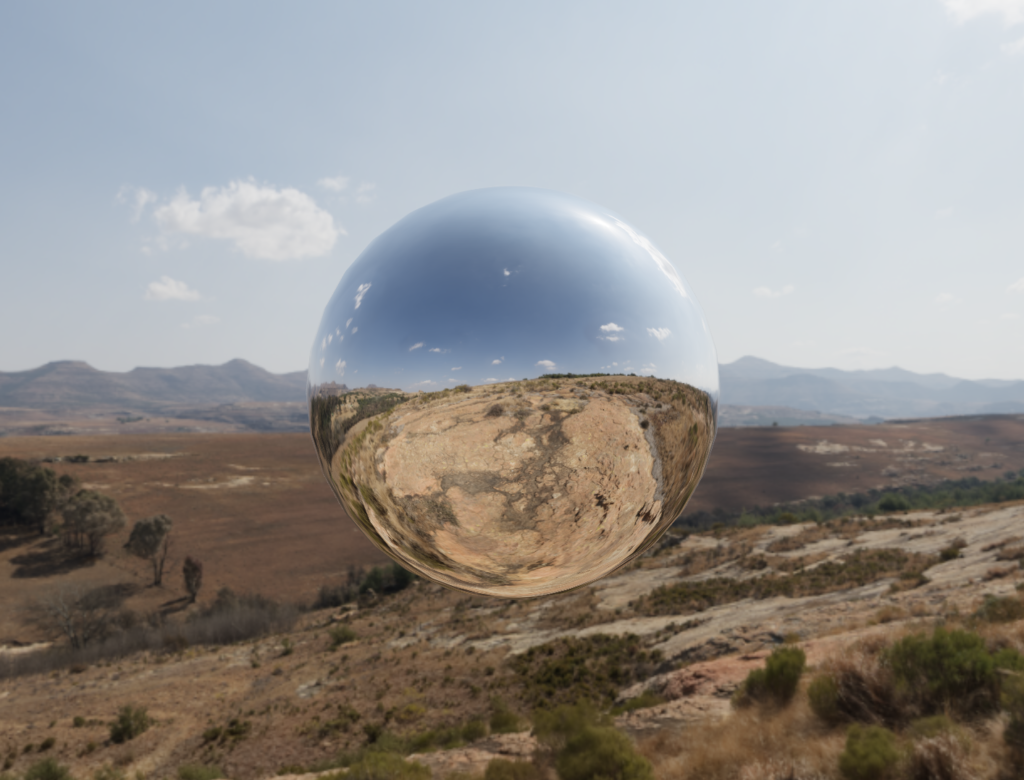
I therefore worked through a way of utilizing Low-Quality Image Placeholders (LQIP), a common optimization for regular images in webpages for well over a decade, to get an example scene loading very quickly. This method will load the 1K HDRI (at only ~1MB) first, and then will work on the larger image (such as 4K resolution) in a separate thread using web workers while the user is happily interacting with the scene. Faster HDRI cubemap loading makes a big difference in getting a photorealistic scene running on screen as quickly as possible for a website visitor.
Check out the code for this demo here:
https://github.com/dansh0/react-three-fiber-demo/tree/simplified
There is also a live demo of these methods used in a similar project here:
https://shores.design/index.php/react-three-fiber-demo/
Code Dive!
The goal here is to have the user load the website containing the scene quickly with a low-resolution HDRI image and then load a high-resolution replacement in the background without getting in the way of the user’s interaction with the scene.
First, import libraries needed to set up a scene. This project uses React-Three-Fiber with some libraries from Drei and some tools from core Three.js for HDRI/RGBE loading and management:
import React, { useState, useEffect } from 'react'
import { Canvas, useThree } from '@react-three/fiber'
import { CubeCamera, OrbitControls, PerspectiveCamera } from '@react-three/drei'
import { EquirectangularReflectionMapping, LinearFilter, PMREMGenerator, DataTexture } from 'three'
Now the main App of the React program is set up. This is establishing a “cubemapTexture” variable that is undefined for now. It will eventually store the loaded low-res HDRI image as a Data Texture (THREE.js) and will ultimately be replaced with the high-res HDRI image as a texture as well.
const App = () => {
  // set up placeholder texture array
  const [cubemapTexture, setCubemapTexture] = useState(() => {
    return undefined
  })

  // loading
  useEffect(() => {
    // load 1K texture only on the first render, 2K texture only when selected, and only once
    loadCubemapTexture(setCubemapTexture)
  }, [])

  return (
    <Scene cubemapTexture={cubemapTexture}/>
  )
}
Start the image loading process using a useEffect() React hook with no dependencies. This makes it only load the images once, on initial mounting on the App. More on this “loadCubemapTexture” function later. The last bit here is returning a Scene with the parameter “cubemapTexture”, which we’ll go into next.
The Scene
Let’s dive into the scene code first!
const Scene = ({cubemapTexture}) => {
  // Env, obj, camera
  if (cubemapTexture) {
    return (
      <Canvas>
        <SelectedEnvironment cubemapTexture={cubemapTexture}/>
        <MirrorSphere/>
        <OrbitControls
          maxPolarAngle={Math.PI/2}
          enableZoom={false}
        />
        <PerspectiveCamera
          makeDefault
          position={[600*Math.cos(Math.PI), 600*Math.sin(Math.PI), 0]}/>
      </Canvas>
    )
  } else {
    return null
  }
}
The Scene component is quite simple, and is only returned in full if the HDRI is fully loaded (“cubemapTexture == true”) and ready to use, otherwise you get an empty screen to avoid random half-baked bits on screen. The scene is a somewhat standard R3F scene with an object (“MirrorSphere”), “OrbitControls”, and “PerspectiveCamera”. We also add a component that returns “null” but does parse the loaded cubemap/skybox texture (from the HDRI) into the scene. The “MirrorSphere” object is written like this:
const MirrorSphere = () => {
  // Central mirror-surfaced sphere

  return (
    <CubeCamera>
      {(texture) => (
        <mesh scale={[200,200,200]}>
          <sphereGeometry args={[0.7071]}/>
          <meshStandardMaterial envMap={texture} roughness={0.0} metalness={1}/>
        </mesh>
      )}
    </CubeCamera>
  )
}
It is a “sphereGeometry” from THREE.js with a metallic material referencing the output texture of a “CubeCamera”. The cube camera is neat trick to get a cheap raytracing single bounce of the scene from the object. It actually isn’t really necessary here since we can use the loaded texture of the HDRI as a cubemap texture, I just have this here from a larger demo with other objects floating around.
Web Workers Code
Without web workers, the app will lag and stutter while the low-res image is loaded and the high-res is still loading. The entire goal here is to provide a clean user experience, so any stuttering looks bad. The web worker runs the intensive task in a separate thread, allowing the render thread to run smoothly.
Opening a new file and calling it “RGBEworker.js”, we can define the operation of a web worker to be used by the main app file. The only thing this does is wait for a request containing a file path of an HDRI image, then load it and send it back in the form of a buffer array.
import { RGBELoader } from 'three/addons/loaders/RGBELoader.js'

// global loader
const loader = new RGBELoader()

onmessage = (message) => {
    let fileName = message.data

    loader.load(fileName, hdrMap => {
        postMessage([hdrMap.source.data.data.buffer, hdrMap.source.data.width, hdrMap.source.data.height])
    })
}
We import the “RGBELoader” from THREE.js here, which is the tool used to load HDRI images. Then we take the file path provided and load it using this loader. In the callback we post a message back to the main function with the data buffer, data width and height only. This is because web workers cannot communicate complicated objects like THREE.js Textures, but they can send the data directly and reconstruct the object on the other side.
If you wanted to get progress info for a progress/loading bar, here would be the place to do it. Using channel names as the first parameter in the sent data is a great way to do this, such as “postMessage([‘imageRespose’, buffer, width, height])” and “postMessage([‘progressUpdate’, progressPercent])”
To the imports at the top of the main file we add the following so that the script loads correctly.
import Worker from './workers/RGBEWorker.js?worker'
HDRI Loading Code
Remember the “loadCubemapTexture” function called from the App? Let’s look at that next. As a reminder, this is called once on App mount to start the loading of the textures, low-resolution first.
const loadCubemapTexture = (setCubemapTexture) => {
  // load the HDR maps using a worker thread
  const worker = new Worker()

  const hdrFile = 'fouriesburg_mountain_midday_1k.hdr'
  const hdrFile4k = 'fouriesburg_mountain_midday_4k.hdr'
  let fileName = '../../cubemaps/' + hdrFile

  // request worker load
  worker.postMessage(fileName)

  let loadedFlag = false

  // respond to load
  worker.onmessage = (message) => {
      let hdrMap = new DataTexture(new Uint16Array(message.data[0]), message.data[1], message.data[2], 1023, 1016, 300, 1001, 1001, 1006, 1006, 1, 'srgb-linear')
      hdrMap.flipY = true
      hdrMap.mapping = EquirectangularReflectionMapping
      hdrMap.minFilter = LinearFilter
      hdrMap.magFilter = LinearFilter
      hdrMap.needsUpdate = true

      // update texture in array
      setCubemapTexture(hdrMap)

      if (!loadedFlag) {
        loadedFlag = true
        fileName = '../../cubemaps/' + hdrFile4k
        worker.postMessage(fileName)
      }
  }
}
This function creates a web worker and asks it to start loading the low-res image, and then waits for the response. The high-res load is recursively called, so we keep track of a “loadedFlag” variable to know which image we’re working with at the time. If all looks good, then we construct a Data Texture from the buffer data and adjust some texture settings, then we use the “setCubemapTexture” hook to update the texture referenced elsewhere in the app. Thanks to this React hook that we defined in the main App component, changing the texture with this will trigger updates everywhere, meaning we get a render immediately on load completion. Once the low-res is done loading, the web worker is immediately asked to start on the high-res image.
The “EquirectangularReflectionMapping” mapping is important to declare how the image is wrapped around the skybox/cubemap. It should also be noted that my implementation uses a downloaded HDRI image, so trying it for yourself might involve playing around with filepaths.
The environment, including cubemaps and skyboxes, are set using the “SelectedEnvironment” component called from the “Scene” component. This converts the skybox/cubemap texture to the space of the scene, and then applies it to the scene background and environment.
const SelectedEnvironment = ({cubemapTexture}) => {
  // Environment
  const { gl, scene } = useThree() // Get renderer and scene data

  // Load HDR
  const pmremGen = new PMREMGenerator( gl )
  pmremGen.compileEquirectangularShader()

  // modify textures for cubemap
  let texture = pmremGen.fromEquirectangular( cubemapTexture ).texture

  // set texture to environment and background
  scene.environment = texture
  scene.background = texture

  return null
}
Closing Thoughts
That’s it! Hopefully this works for you if your project can benefit from faster HDRI cubemap loading. I provided a link to the github repo’s branch that this code is from, and the live demo of a larger project that uses these techniques. Comment below if you have any questions, suggestions for improvements, or find any bugs in the code.
If you want to learn more about these topics for your project, or want to hire me on a freelance/contract basis to implement optimizations like this and others in your web or desktop graphics projects, please browse the rest of this website and contact me for details.
One response
thank your for this article, keep up the good work